The Worksheet Class (Page Setup)#
Page set-up methods affect the way that a worksheet looks to the user or when it is printed. They control features such as paper size, orientation, page headers and margins and gridlines.
These methods are really just standard worksheet methods. They are documented separately for the sake of clarity.
worksheet.set_landscape()#
- set_landscape()#
Set the page orientation as landscape.
This method is used to set the orientation of a worksheet’s printed page to landscape:
worksheet.set_landscape()
worksheet.set_portrait()#
- set_portrait()#
Set the page orientation as portrait.
This method is used to set the orientation of a worksheet’s printed page to portrait. The default worksheet orientation is portrait, so you won’t generally need to call this method:
worksheet.set_portrait()
worksheet.set_page_view()#
- set_page_view(view=1)#
Set the page view mode.
- Parameters:
view (int) – 0: Normal, 1: Page Layout, 2: Page Break.
This method is used to display the worksheet in “Page View/Layout” mode:
worksheet.set_page_view()
It can also be used to set the other view modes:
0: Normal view mode.
1: Page view mode (the default).
2: Page break view mode. Same as
set_pagebreak_view().
worksheet.set_pagebreak_view()#
- set_pagebreak_view()#
Set the page break view mode.
This method is used to display the worksheet in “Page Break Preview” mode:
worksheet.set_pagebreak_view()
worksheet.set_paper()#
This method is used to set the paper format for the printed output of a worksheet. The following paper styles are available:
Index |
Paper format |
Paper size |
|---|---|---|
0 |
Printer default |
Printer default |
1 |
Letter |
8 1/2 x 11 in |
2 |
Letter Small |
8 1/2 x 11 in |
3 |
Tabloid |
11 x 17 in |
4 |
Ledger |
17 x 11 in |
5 |
Legal |
8 1/2 x 14 in |
6 |
Statement |
5 1/2 x 8 1/2 in |
7 |
Executive |
7 1/4 x 10 1/2 in |
8 |
A3 |
297 x 420 mm |
9 |
A4 |
210 x 297 mm |
10 |
A4 Small |
210 x 297 mm |
11 |
A5 |
148 x 210 mm |
12 |
B4 |
250 x 354 mm |
13 |
B5 |
182 x 257 mm |
14 |
Folio |
8 1/2 x 13 in |
15 |
Quarto |
215 x 275 mm |
16 |
— |
10x14 in |
17 |
— |
11x17 in |
18 |
Note |
8 1/2 x 11 in |
19 |
Envelope 9 |
3 7/8 x 8 7/8 |
20 |
Envelope 10 |
4 1/8 x 9 1/2 |
21 |
Envelope 11 |
4 1/2 x 10 3/8 |
22 |
Envelope 12 |
4 3/4 x 11 |
23 |
Envelope 14 |
5 x 11 1/2 |
24 |
C size sheet |
— |
25 |
D size sheet |
— |
26 |
E size sheet |
— |
27 |
Envelope DL |
110 x 220 mm |
28 |
Envelope C3 |
324 x 458 mm |
29 |
Envelope C4 |
229 x 324 mm |
30 |
Envelope C5 |
162 x 229 mm |
31 |
Envelope C6 |
114 x 162 mm |
32 |
Envelope C65 |
114 x 229 mm |
33 |
Envelope B4 |
250 x 353 mm |
34 |
Envelope B5 |
176 x 250 mm |
35 |
Envelope B6 |
176 x 125 mm |
36 |
Envelope |
110 x 230 mm |
37 |
Monarch |
3.875 x 7.5 in |
38 |
Envelope |
3 5/8 x 6 1/2 in |
39 |
Fanfold |
14 7/8 x 11 in |
40 |
German Std Fanfold |
8 1/2 x 12 in |
41 |
German Legal Fanfold |
8 1/2 x 13 in |
Note, it is likely that not all of these paper types will be available to the end user since it will depend on the paper formats that the user’s printer supports. Therefore, it is best to stick to standard paper types:
worksheet.set_paper(1)  # US Letter
worksheet.set_paper(9)  # A4
If you do not specify a paper type the worksheet will print using the printer’s default paper style.
worksheet.center_horizontally()#
- center_horizontally()#
Center the printed page horizontally.
Center the worksheet data horizontally between the margins on the printed page:
worksheet.center_horizontally()
worksheet.center_vertically()#
- center_vertically()#
Center the printed page vertically.
Center the worksheet data vertically between the margins on the printed page:
worksheet.center_vertically()
worksheet.set_margins()#
- set_margins([left=0.7,] right=0.7,] top=0.75,] bottom=0.75]]])#
Set the worksheet margins for the printed page.
The set_margins() method is used to set the margins of the worksheet when
it is printed. The units are in inches. All parameters are optional and have
default values corresponding to the default Excel values.
worksheet.set_header()#
- set_header([header='',] options]])#
Set the printed page header caption and options.
- Parameters:
header (string) – Header string with Excel control characters.
options (dict) – Header options.
Headers and footers are generated using a string which is a combination of plain text and control characters.
The available control character are:
Control |
Category |
Description |
|---|---|---|
&L |
Justification |
Left |
&C |
Center |
|
&R |
Right |
|
&P |
Information |
Page number |
&N |
Total number of pages |
|
&D |
Date |
|
&T |
Time |
|
&F |
File name |
|
&A |
Worksheet name |
|
&Z |
Workbook path |
|
&fontsize |
Font |
Font size |
&”font,style” |
Font name and style |
|
&U |
Single underline |
|
&E |
Double underline |
|
&S |
Strikethrough |
|
&X |
Superscript |
|
&Y |
Subscript |
|
&[Picture] |
Images |
Image placeholder |
&G |
Same as &[Picture] |
|
&& |
Misc. |
Literal ampersand “&” |
Text in headers and footers can be justified (aligned) to the left, center and
right by prefixing the text with the control characters &L, &C and
&R.
For example:
worksheet.set_header('&LHello')

    ---------------------------------------------------------------
   |                                                               |
   | Hello                                                         |
   |                                                               |


$worksheet->set_header('&CHello');

    ---------------------------------------------------------------
   |                                                               |
   |                          Hello                                |
   |                                                               |


$worksheet->set_header('&RHello');

    ---------------------------------------------------------------
   |                                                               |
   |                                                         Hello |
   |                                                               |
For simple text, if you do not specify any justification the text will be
centered. However, you must prefix the text with &C if you specify a font
name or any other formatting:
worksheet.set_header('Hello')

    ---------------------------------------------------------------
   |                                                               |
   |                          Hello                                |
   |                                                               |
You can have text in each of the justification regions:
worksheet.set_header('&LCiao&CBello&RCielo')

    ---------------------------------------------------------------
   |                                                               |
   | Ciao                     Bello                          Cielo |
   |                                                               |
The information control characters act as variables that Excel will update as the workbook or worksheet changes. Times and dates are in the users default format:
worksheet.set_header('&CPage &P of &N')

    ---------------------------------------------------------------
   |                                                               |
   |                        Page 1 of 6                            |
   |                                                               |

worksheet.set_header('&CUpdated at &T')

    ---------------------------------------------------------------
   |                                                               |
   |                    Updated at 12:30 PM                        |
   |                                                               |
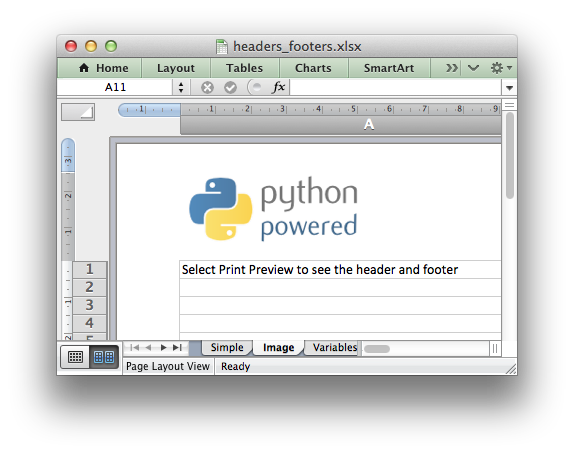
Images can be inserted using the options shown below. Each image must
have a placeholder in header string using the &[Picture] or &G
control characters:
worksheet.set_header('&L&G', {'image_left': 'logo.jpg'})
You can specify the font size of a section of the text by prefixing it with the
control character &n where n is the font size:
worksheet1.set_header('&C&30Hello Big')
worksheet2.set_header('&C&10Hello Small')
You can specify the font of a section of the text by prefixing it with the
control sequence &"font,style" where fontname is a font name such as
“Courier New” or “Times New Roman” and style is one of the standard
Windows font descriptions: “Regular”, “Italic”, “Bold” or “Bold Italic”:
worksheet1.set_header('&C&"Courier New,Italic"Hello')
worksheet2.set_header('&C&"Courier New,Bold Italic"Hello')
worksheet3.set_header('&C&"Times New Roman,Regular"Hello')
It is possible to combine all of these features together to create
sophisticated headers and footers. As an aid to setting up complicated headers
and footers you can record a page set-up as a macro in Excel and look at the
format strings that VBA produces. Remember however that VBA uses two double
quotes "" to indicate a single double quote. For the last example above
the equivalent VBA code looks like this:
.LeftHeader = ""
.CenterHeader = "&""Times New Roman,Regular""Hello"
.RightHeader = ""
Alternatively you can inspect the header and footer strings in an Excel file by unzipping it and grepping the XML sub-files. The following shows how to do that using libxml’s xmllint to format the XML for clarity:
$ unzip myfile.xlsm -d myfile
$ xmllint --format `find myfile -name "*.xml" | xargs` | egrep "Header|Footer" | sed 's/&/\&/g'

  <headerFooter scaleWithDoc="0">
    <oddHeader>&L&P</oddHeader>
  </headerFooter>
To include a single literal ampersand & in a header or footer you should
use a double ampersand &&:
worksheet1.set_header('&CCuriouser && Curiouser - Attorneys at Law')
The available options are:
margin: (float) Header margin in inches. Defaults to 0.3 inch.image_left: (string) The path to the image. Needs&Gplaceholder.image_center: (string) Same as above.image_right: (string) Same as above.image_data_left: (BytesIO) A byte stream of the image data.image_data_center: (BytesIO) Same as above.image_data_right: (BytesIO) Same as above.scale_with_doc: (boolean) Scale header with document. Defaults to True.align_with_margins: (boolean) Align header to margins. Defaults to True.
As with the other margins the margin value should be in inches. The
default header and footer margin is 0.3 inch. It can be changed as follows:
worksheet.set_header('&CHello', {'margin': 0.75})
The header and footer margins are independent of, and should not be confused with, the top and bottom worksheet margins.
The image options must have an accompanying &[Picture] or &G control
character in the header string:
worksheet.set_header('&L&[Picture]&C&[Picture]&R&[Picture]',
                     {'image_left':   'red.jpg',
                      'image_center': 'blue.jpg',
                      'image_right':  'yellow.jpg'})
The image_data_ parameters are used to add an in-memory byte stream in
io.BytesIO format:
image_file = open('logo.jpg', 'rb')
image_data = BytesIO(image_file.read())

worksheet.set_header('&L&G',
                     {'image_left': 'logo.jpg',
                      'image_data_left': image_data})
When using the image_data_ parameters a filename must still be passed to
to the equivalent image_ parameter since it is required by Excel. See also
insert_image() for details on handling images from byte streams.
Note, Excel does not allow header or footer strings longer than 255 characters, including control characters. Strings longer than this will not be written and a warning will be issued.
worksheet.repeat_rows()#
- repeat_rows(first_row[, last_row])#
Set the number of rows to repeat at the top of each printed page.
For large Excel documents it is often desirable to have the first row or rows of the worksheet print out at the top of each page.
This can be achieved by using the repeat_rows() method. The parameters
first_row and last_row are zero based. The last_row parameter is
optional if you only wish to specify one row:
worksheet1.repeat_rows(0)     # Repeat the first row.
worksheet2.repeat_rows(0, 1)  # Repeat the first two rows.
worksheet.repeat_columns()#
- repeat_columns(first_col[, last_col])#
Set the columns to repeat at the left hand side of each printed page.
For large Excel documents it is often desirable to have the first column or columns of the worksheet print out at the left hand side of each page.
This can be achieved by using the repeat_columns() method. The parameters
first_column and last_column are zero based. The last_column
parameter is optional if you only wish to specify one column. You can also
specify the columns using A1 column notation, see Working with Cell Notation for
more details.:
worksheet1.repeat_columns(0)      # Repeat the first column.
worksheet2.repeat_columns(0, 1)   # Repeat the first two columns.
worksheet3.repeat_columns('A:A')  # Repeat the first column.
worksheet4.repeat_columns('A:B')  # Repeat the first two columns.
worksheet.hide_gridlines()#
- hide_gridlines([option=1])#
Set the option to hide gridlines on the screen and the printed page.
- Parameters:
option (int) – Hide gridline options. See below.
This method is used to hide the gridlines on the screen and printed page. Gridlines are the lines that divide the cells on a worksheet. Screen and printed gridlines are turned on by default in an Excel worksheet.
If you have defined your own cell borders you may wish to hide the default gridlines:
worksheet.hide_gridlines()
The following values of option are valid:
Don’t hide gridlines.
Hide printed gridlines only.
Hide screen and printed gridlines.
If you don’t supply an argument the default option is 1, i.e. only the printed gridlines are hidden.
worksheet.print_row_col_headers()#
- print_row_col_headers()#
Set the option to print the row and column headers on the printed page.
When you print a worksheet from Excel you get the data selected in the print area. By default the Excel row and column headers (the row numbers on the left and the column letters at the top) aren’t printed.
The print_row_col_headers() method sets the printer option to print these
headers:
worksheet.print_row_col_headers()
worksheet.hide_row_col_headers()#
- hide_row_col_headers()#
Set the option to hide the row and column headers in a worksheet.
This method is similar to the print_row_col_headers() except that it hides
the row and column headers on the worksheet:
worksheet.hide_row_col_headers()
worksheet.print_area()#
- print_area(first_row, first_col, last_row, last_col)#
Set the print area in the current worksheet.
- Parameters:
first_row (integer) – The first row of the range. (All zero indexed.)
first_col (integer) – The first column of the range.
last_row (integer) – The last row of the range.
last_col (integer) – The last col of the range.
- Returns:
0: Success.
- Returns:
-1: Row or column is out of worksheet bounds.
This method is used to specify the area of the worksheet that will be printed.
All four parameters must be specified. You can also use A1 notation, see Working with Cell Notation:
worksheet1.print_area('A1:H20')     # Cells A1 to H20.
worksheet2.print_area(0, 0, 19, 7)  # The same as above.
In order to set a row or column range you must specify the entire range:
worksheet3.print_area('A1:H1048576') # Same as A:H.
worksheet.print_across()#
- print_across()#
Set the order in which pages are printed.
The print_across method is used to change the default print direction. This
is referred to by Excel as the sheet “page order”:
worksheet.print_across()
The default page order is shown below for a worksheet that extends over 4 pages. The order is called “down then across”:
[1] [3]
[2] [4]
However, by using the print_across method the print order will be changed
to “across then down”:
[1] [2]
[3] [4]
worksheet.fit_to_pages()#
- fit_to_pages(width, height)#
Fit the printed area to a specific number of pages both vertically and horizontally.
The fit_to_pages() method is used to fit the printed area to a specific
number of pages both vertically and horizontally. If the printed area exceeds
the specified number of pages it will be scaled down to fit. This ensures that
the printed area will always appear on the specified number of pages even if
the page size or margins change:
worksheet1.fit_to_pages(1, 1)  # Fit to 1x1 pages.
worksheet2.fit_to_pages(2, 1)  # Fit to 2x1 pages.
worksheet3.fit_to_pages(1, 2)  # Fit to 1x2 pages.
The print area can be defined using the print_area() method as described
above.
A common requirement is to fit the printed output to n pages wide but have
the height be as long as necessary. To achieve this set the height to
zero:
worksheet1.fit_to_pages(1, 0) # 1 page wide and as long as necessary.
Note
Although it is valid to use both fit_to_pages() and
set_print_scale() on the same worksheet in Excel only allows one of
these options to be active at a time. The last method call made will set
the active option.
Note
The fit_to_pages() will override any manual page breaks that are
defined in the worksheet.
Note
When using fit_to_pages() it may also be required to set the
printer paper size using set_paper() or else Excel will default
to “US Letter”.
worksheet.set_start_page()#
- set_start_page()#
Set the start/first page number when printing.
- Parameters:
start_page (int) – Starting page number.
The set_start_page() method is used to set the page number of the starting
page when the worksheet is printed out. It is the same as the “First Page
Number” option in Excel:
# Start print from page 2.
worksheet.set_start_page(2)
worksheet.set_print_scale()#
- set_print_scale()#
Set the scale factor for the printed page.
- Parameters:
scale (int) – Print scale of worksheet to be printed.
Set the scale factor of the printed page. Scale factors in the range
10 <= $scale <= 400 are valid:
worksheet1.set_print_scale(50)
worksheet2.set_print_scale(75)
worksheet3.set_print_scale(300)
worksheet4.set_print_scale(400)
The default scale factor is 100. Note, set_print_scale() does not affect
the scale of the visible page in Excel. For that you should use
set_zoom().
Note also that although it is valid to use both fit_to_pages() and
set_print_scale() on the same worksheet Excel only allows one of these
options to be active at a time. The last method call made will set the active
option.
worksheet.print_black_and_white()#
- print_black_and_white()#
Set the worksheet to print in black and white.
Set the option to print the worksheet in black and white:
worksheet.print_black_and_white()
worksheet.set_h_pagebreaks()#
- set_h_pagebreaks(breaks)#
Set the horizontal page breaks on a worksheet.
- Parameters:
breaks (list) – List of page break rows.
The set_h_pagebreaks() method adds horizontal page breaks to a worksheet. A
page break causes all the data that follows it to be printed on the next page.
Horizontal page breaks act between rows.
The set_h_pagebreaks() method takes a list of one or more page breaks:
worksheet1.set_v_pagebreaks([20])
worksheet2.set_v_pagebreaks([20, 40, 60, 80, 100])
To create a page break between rows 20 and 21 you must specify the break at row 21. However in zero index notation this is actually row 20. So you can pretend for a small while that you are using 1 index notation:
worksheet.set_h_pagebreaks([20]) # Break between row 20 and 21.
Note
Note: If you specify the “fit to page” option via the fit_to_pages()
method it will override all manual page breaks.
There is a silent limitation of 1023 horizontal page breaks per worksheet in line with an Excel internal limitation.
worksheet.set_v_pagebreaks()#
- set_v_pagebreaks(breaks)#
Set the vertical page breaks on a worksheet.
- Parameters:
breaks (list) – List of page break columns.
The set_v_pagebreaks() method is the same as the above
set_h_pagebreaks() method except it adds page breaks between columns.