The Workbook Class#
The Workbook class is the main class exposed by the XlsxWriter module and it is the only class that you will need to instantiate directly.
The Workbook class represents the entire spreadsheet as you see it in Excel and internally it represents the Excel file as it is written on disk.
Constructor#
- Workbook(filename[, options])#
Create a new XlsxWriter Workbook object.
- Parameters:
filename (string) – The name of the new Excel file to create.
options (dict) – Optional workbook parameters. See below.
- Return type:
A Workbook object.
The Workbook() constructor is used to create a new Excel workbook with a
given filename:
import xlsxwriter

workbook  = xlsxwriter.Workbook('filename.xlsx')
worksheet = workbook.add_worksheet()

worksheet.write(0, 0, 'Hello Excel')

workbook.close()

The constructor options are:
constant_memory: Reduces the amount of data stored in memory so that large files can be written efficiently:
workbook = xlsxwriter.Workbook(filename, {'constant_memory': True})
Note, in this mode a row of data is written and then discarded when a cell in a new row is added via one of the worksheet
write_()methods. Therefore, once this mode is active, data should be written in sequential row order. For this reason theadd_table()andmerge_range()Worksheet methods don’t work in this mode.See Working with Memory and Performance for more details.
tmpdir:
XlsxWriterstores workbook data in temporary files prior to assembling the final XLSX file. The temporary files are created in the system’s temp directory. If the default temporary directory isn’t accessible to your application, or doesn’t contain enough space, you can specify an alternative location using thetmpdiroption:workbook = xlsxwriter.Workbook(filename, {'tmpdir': '/home/user/tmp'})
The temporary directory must exist and will not be created.
in_memory: To avoid the use of temporary files in the assembly of the final XLSX file, for example on servers that don’t allow temp files, set the
in_memoryconstructor option toTrue:workbook = xlsxwriter.Workbook(filename, {'in_memory': True})
This option overrides the
constant_memoryoption.Note
This option used to be the recommended way of deploying XlsxWriter on Google APP Engine since it didn’t support a
/tmpdirectory. However, the Python 3 Runtime Environment in Google App Engine supports a filesystem with read/write access to /tmp which means this option isn’t required.strings_to_numbers: Enable the worksheet.
write()method to convert strings to numbers, where possible, usingfloat()in order to avoid an Excel warning about “Numbers Stored as Text”. The default isFalse. To enable this option use:workbook = xlsxwriter.Workbook(filename, {'strings_to_numbers': True})
strings_to_formulas: Enable the worksheet.
write()method to convert strings to formulas. The default isTrue. To disable this option use:workbook = xlsxwriter.Workbook(filename, {'strings_to_formulas': False})
strings_to_urls: Enable the worksheet.
write()method to convert strings to urls. The default isTrue. To disable this option use:workbook = xlsxwriter.Workbook(filename, {'strings_to_urls': False})
use_future_functions: Enable the use of newer Excel “future” functions without having to prefix them with with
_xlfn.. The default isFalse. To enable this option use:workbook = xlsxwriter.Workbook(filename, {'use_future_functions': True})
See also Formulas added in Excel 2010 and later.
max_url_length: Set the maximum length for hyperlinks in worksheets. The default is 2079 and the minimum is 255. Versions of Excel prior to Excel 2015 limited hyperlink links and anchor/locations to 255 characters each. Versions after that support urls up to 2079 characters. XlsxWriter versions >= 1.2.3 support the new longer limit by default. However, a lower or user defined limit can be set via the
max_url_lengthoption:workbook = xlsxwriter.Workbook(filename, {'max_url_length': 255})
nan_inf_to_errors: Enable the worksheet.
write()andwrite_number()methods to convertnan,infand-infto Excel errors. Excel doesn’t handle NAN/INF as numbers so as a workaround they are mapped to formulas that yield the error codes#NUM!and#DIV/0!. The default isFalse. To enable this option use:workbook = xlsxwriter.Workbook(filename, {'nan_inf_to_errors': True})
default_date_format: This option is used to specify a default date format string for use with the worksheet.
write_datetime()method when an explicit format isn’t given. See Working with Dates and Time for more details:xlsxwriter.Workbook(filename, {'default_date_format': 'dd/mm/yy'})
remove_timezone: Excel doesn’t support timezones in datetimes/times so there isn’t any fail-safe way that XlsxWriter can map a Python timezone aware datetime into an Excel datetime in functions such as
write_datetime(). As such the user should convert and remove the timezones in some way that makes sense according to their requirements. Alternatively theremove_timezoneoption can be used to strip the timezone from datetime values. The default isFalse. To enable this option use:workbook = xlsxwriter.Workbook(filename, {'remove_timezone': True})
See also Timezone Handling in XlsxWriter.
use_zip64: Use ZIP64 extensions when writing the xlsx file zip container to allow files greater than 4 GB. This is the same as calling
use_zip64()after creating the Workbook object. This constructor option is just syntactic sugar to make the use of the option more explicit. The following are equivalent:workbook = xlsxwriter.Workbook(filename, {'use_zip64': True}) # Same as: workbook = xlsxwriter.Workbook(filename) workbook.use_zip64()
See the note about the Excel warning caused by using this option in
use_zip64().date_1904: Excel for Windows uses a default epoch of 1900 and Excel for Mac uses an epoch of 1904. However, Excel on either platform will convert automatically between one system and the other. XlsxWriter stores dates in the 1900 format by default. If you wish to change this you can use the
date_1904workbook option. This option is mainly for enhanced compatibility with Excel and in general isn’t required very often:workbook = xlsxwriter.Workbook(filename, {'date_1904': True})
When specifying a filename it is recommended that you use an .xlsx
extension or Excel will generate a warning when opening the file.
The Workbook() method also works using the with context manager. In
which case it doesn’t need an explicit close() statement:
with xlsxwriter.Workbook('hello_world.xlsx') as workbook:
    worksheet = workbook.add_worksheet()

    worksheet.write('A1', 'Hello world')
It is possible to write files to in-memory strings using BytesIO as follows:
from io import BytesIO

output = BytesIO()
workbook = xlsxwriter.Workbook(output)
worksheet = workbook.add_worksheet()

worksheet.write('A1', 'Hello')
workbook.close()

xlsx_data = output.getvalue()
To avoid the use of any temporary files and keep the entire file in-memory use
the in_memory constructor option shown above.
See also Example: Simple HTTP Server.
workbook.add_worksheet()#
- add_worksheet([name])#
Add a new worksheet to a workbook.
- Parameters:
name (string) – Optional worksheet name, defaults to Sheet1, etc.
- Return type:
A worksheet object.
- Raises:
DuplicateWorksheetName – if a duplicate worksheet name is used.
InvalidWorksheetName – if an invalid worksheet name is used.
ReservedWorksheetName – if a reserved worksheet name is used.
The add_worksheet() method adds a new worksheet to a workbook.
At least one worksheet should be added to a new workbook. The Worksheet object is used to write data and configure a worksheet in the workbook.
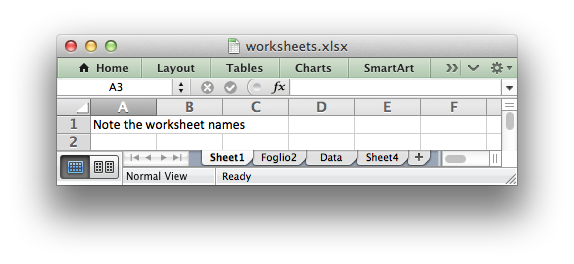
The name parameter is optional. If it is not specified, or blank, the
default Excel convention will be followed, i.e. Sheet1, Sheet2, etc.:
worksheet1 = workbook.add_worksheet()           # Sheet1
worksheet2 = workbook.add_worksheet('Foglio2')  # Foglio2
worksheet3 = workbook.add_worksheet('Data')     # Data
worksheet4 = workbook.add_worksheet()           # Sheet4
The worksheet name must be a valid Excel worksheet name:
It must be less than 32 characters. This error will raise a
InvalidWorksheetNameexception.It cannot contain any of the characters:
[ ] : * ? / \. This error will raise aInvalidWorksheetNameexception.It cannot begin or end with an apostrophe. This error will raise a
InvalidWorksheetNameexception.You cannot use the same, case insensitive,
namefor more than one worksheet. This error will raise aDuplicateWorksheetNameexception.You should not use the Excel reserved name “History”, or case insensitive variants as this is restricted in English, and other, versions of Excel.
The rules for worksheet names in Excel are explained in the Microsoft Office documentation on how to Rename a worksheet.
workbook.add_format()#
- add_format([properties])#
Create a new Format object to formats cells in worksheets.
- Parameters:
properties (dictionary) – An optional dictionary of format properties.
- Return type:
A format object.
The add_format() method can be used to create new Format
objects which are used to apply formatting to a cell. You can either define
the properties at creation time via a dictionary of property values or later
via method calls:
format1 = workbook.add_format(props)  # Set properties at creation.
format2 = workbook.add_format()       # Set properties later.
See the The Format Class section for more details about Format properties and how to set them.
workbook.add_chart()#
- add_chart(options)#
Create a chart object that can be added to a worksheet.
- Parameters:
options (dictionary) – An dictionary of chart type options.
- Return type:
A Chart object.
This method is use to create a new chart object that can be inserted into a
worksheet via the insert_chart() Worksheet method:
chart = workbook.add_chart({'type': 'column'})
The properties that can be set are:
type    (required)
subtype (optional)
name    (optional)
typeThis is a required parameter. It defines the type of chart that will be created:
chart = workbook.add_chart({'type': 'line'})
The available types are:
area
bar
column
doughnut
line
pie
radar
scatter
stock
subtypeUsed to define a chart subtype where available:
workbook.add_chart({'type': 'bar', 'subtype': 'stacked'})
See the The Chart Class for a list of available chart subtypes.
nameSet the name for the chart sheet:
chart = workbook.add_chart({'type': 'column', 'name': 'MyChart'})
The name property is optional and if it isn’t supplied it will default to
Chart1,Chart2, etc. The name must be a valid Excel chart name.
Note
A chart can only be inserted into a worksheet once. If several similar
charts are required then each one must be created separately with
add_chart().
See also Working with Charts and Chart Examples.
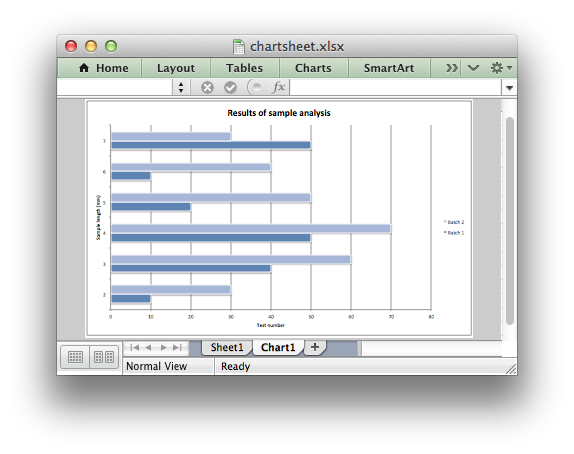
workbook.add_chartsheet()#
- add_chartsheet([sheetname])#
Add a new add_chartsheet to a workbook.
- Parameters:
sheetname (string) – Optional chartsheet name, defaults to Chart1, etc.
- Return type:
A chartsheet object.
The add_chartsheet() method adds a new chartsheet to a workbook.
See The Chartsheet Class for details.
The sheetname parameter is optional. If it is not specified the default
Excel convention will be followed, i.e. Chart1, Chart2, etc.
The chartsheet name must be a valid Excel worksheet name. See
add_worksheet() for the limitation on Excel worksheet names.
workbook.close()#
- close()#
Close the Workbook object and write the XLSX file.
- Raises:
FileCreateError – if there is a file or permissions error during writing.
DuplicateTableName – if a duplicate worksheet table name was added.
EmptyChartSeries – if a chart is added without a data series.
UndefinedImageSize – if an image doesn’t contain height/width data.
UnsupportedImageFormat – if an image type isn’t supported.
FileSizeError – if the filesize would require ZIP64 extensions.
The workbook close() method writes all data to the xlsx file and closes
it:
workbook.close()
This is a required method call to close and write the xlsxwriter file, unless
you are using the with context manager, see below.
The Workbook object also works using the with context manager. In
which case it doesn’t need an explicit close() statement:
With xlsxwriter.Workbook('hello_world.xlsx') as workbook:
    worksheet = workbook.add_worksheet()

    worksheet.write('A1', 'Hello world')
The workbook will close automatically when exiting the scope of the with
statement.
The most common exception during close() is FileCreateError which is
generally caused by a write permission error. On Windows this usually occurs
if the file being created is already open in Excel. This exception can be
caught in a try block where you can instruct the user to close the open
file before overwriting it:
while True:
    try:
        workbook.close()
    except xlsxwriter.exceptions.FileCreateError as e:
        decision = input("Exception caught in workbook.close(): %s\n"
                         "Please close the file if it is open in Excel.\n"
                         "Try to write file again? [Y/n]: " % e)
        if decision != 'n':
            continue

    break
The close() method can only write a file once. It doesn’t behave like a
save method and it cannot be called multiple times to write a file at
different stages. If it is called more than once it will raise a
UserWarning in order to help avoid issues where a file is closed within a
loop or at the wrong scope level.
See also Example: Catch exception on closing.
workbook.set_size()#
- set_size(width, height)#
Set the size of a workbook window.
The set_size() method can be used to set the size of a workbook window:
workbook.set_size(1200, 800)
The Excel window size was used in Excel 2007 to define the width and height of a workbook window within the Multiple Document Interface (MDI). In later versions of Excel for Windows this interface was dropped. This method is currently only useful when setting the window size in Excel for Mac 2011. The units are pixels and the default size is 1073 x 644.
Note, this doesn’t equate exactly to the Excel for Mac pixel size since it is based on the original Excel 2007 for Windows sizing. Some trial and error may be required to get an exact size.
workbook.tab_ratio()#
- set_tab_ratio(tab_ratio)#
Set the ratio between the worksheet tabs and the horizontal slider.
- Parameters:
tab_ratio (float) – The tab ratio between 0 and 100.
The set_tab_ratio() method can be used to set the ratio between worksheet
tabs and the horizontal slider at the bottom of a workbook. This can be
increased to give more room to the tabs or reduced to increase the size of the
horizontal slider:
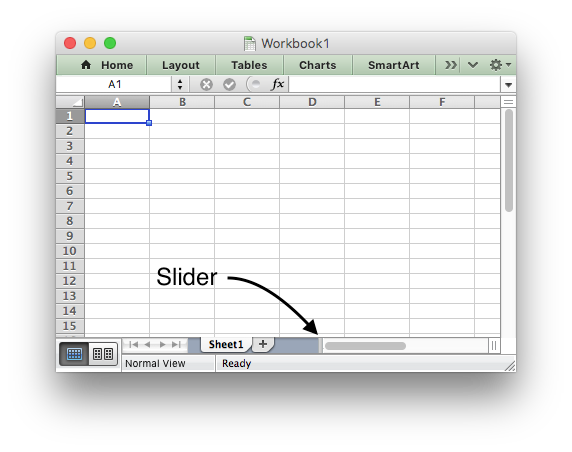
The default value in Excel is 60. It can be changed as follows:
workbook.set_tab_ratio(75)
workbook.set_properties()#
- set_properties(properties)#
Set the document properties such as Title, Author etc.
- Parameters:
properties (dict) – Dictionary of document properties.
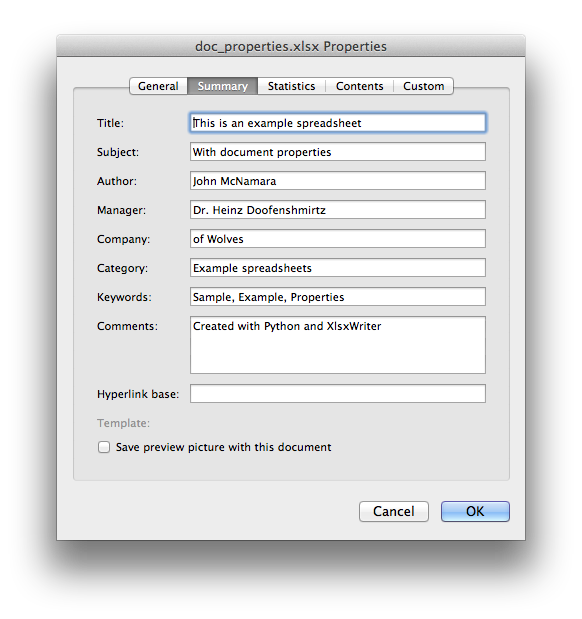
The set_properties() method can be used to set the document properties of the
Excel file created by XlsxWriter. These properties are visible when you
use the Office Button -> Prepare -> Properties option in Excel and are
also available to external applications that read or index windows files.
The properties that can be set are:
titlesubjectauthormanagercompanycategorykeywordscommentsstatushyperlink_basecreated- the file creation date as adatetime.dateobject.
The properties are all optional and should be passed in dictionary format as follows:
workbook.set_properties({
    'title':    'This is an example spreadsheet',
    'subject':  'With document properties',
    'author':   'John McNamara',
    'manager':  'Dr. Heinz Doofenshmirtz',
    'company':  'of Wolves',
    'category': 'Example spreadsheets',
    'keywords': 'Sample, Example, Properties',
    'created':  datetime.date(2018, 1, 1),
    'comments': 'Created with Python and XlsxWriter'})
See also Example: Setting Document Properties.
workbook.set_custom_property()#
- set_custom_property(name, value[, property_type])#
Set a custom document property.
- Parameters:
name (string) – The name of the custom property.
value – The value of the custom property (various types).
property_type (string) – The type of the property. Optional.
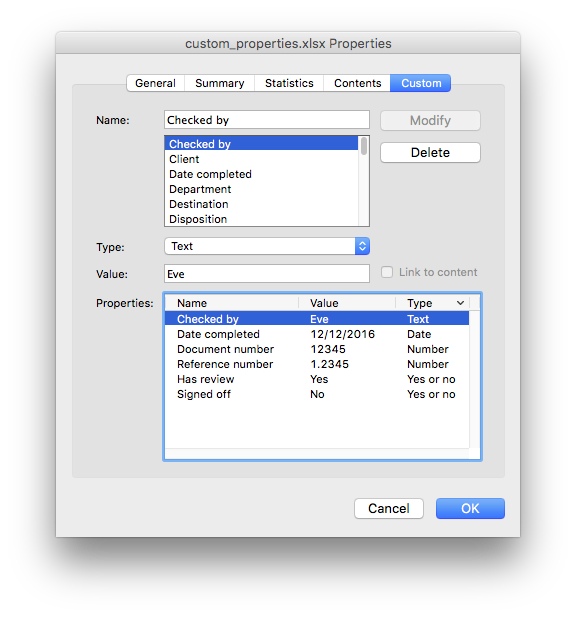
The set_custom_property() method can be used to set one or more custom
document properties not covered by the standard properties in the
set_properties() method above.
For example:
date = datetime.strptime('2016-12-12', '%Y-%m-%d')

workbook.set_custom_property('Checked by',       'Eve')
workbook.set_custom_property('Date completed',   date)
workbook.set_custom_property('Document number',  12345)
workbook.set_custom_property('Reference number', 1.2345)
workbook.set_custom_property('Has review',       True)
workbook.set_custom_property('Signed off',       False)
Date parameters should be datetime.datetime objects.
The optional property_type parameter can be used to set an explicit type
for the custom property, just like in Excel. The available types are:
text
date
number
bool
However, in almost all cases the type will be inferred correctly from the Python type, like in the example above.
Note: the name and value parameters are limited to 255 characters by
Excel.
Custom properties can also be used to set Sensitivity Labels. Sensitivity Labels are a property that can be added to an Office 365 document to indicate that it is compliant with a company’s information protection policies. Sensitivity Labels have designations like “Confidential”, “Internal use only”, or “Public” depending on the policies implemented by the company. They are generally only enabled for enterprise versions of Office.
See the following Microsoft documentation on how to Apply sensitivity labels to your files and email.
Sensitivity Labels are generally stored as custom document properties so they
can be enabled using set_custom_property(). However, since the metadata
differs from company to company you will need to extract some of the required
metadata from sample files.
The first step is to create a new file in Excel and set a non-encrypted sensitivity label. Then unzip the file by changing the extension from .xlsx to .zip or by using a command line utility like this:
$ unzip myfile.xlsx -d myfile
Archive:  myfile.xlsx
  inflating: myfile/[Content_Types].xml
  inflating: myfile/docProps/app.xml
  inflating: myfile/docProps/custom.xml
  inflating: myfile/docProps/core.xml
  inflating: myfile/_rels/.rels
  inflating: myfile/xl/workbook.xml
  inflating: myfile/xl/worksheets/sheet1.xml
  inflating: myfile/xl/styles.xml
  inflating: myfile/xl/theme/theme1.xml
  inflating: myfile/xl/_rels/workbook.xml.rels
Then examine the docProps/custom.xml file from the unzipped xlsx file. The
file doesn’t contain newlines so it is best to view it in an editor that can
handle XML or use a commandline utility like libxml’s xmllint to format the
XML for clarity:
$ xmllint --format myfile/docProps/custom.xml
<?xml version="1.0" encoding="UTF-8" standalone="yes"?>
<Properties
    xmlns="http://schemas.openxmlformats.org/officeDocument/2006/custom-properties"
    xmlns:vt="http://schemas.openxmlformats.org/officeDocument/2006/docPropsVTypes">
  <property fmtid="{D5CDD505-2E9C-101B-9397-08002B2CF9AE}"
            pid="2"
            name="MSIP_Label_2096f6a2-d2f7-48be-b329-b73aaa526e5d_Enabled">
    <vt:lpwstr>true</vt:lpwstr>
  </property>
  <property fmtid="{D5CDD505-2E9C-101B-9397-08002B2CF9AE}"
            pid="3"
            name="MSIP_Label_2096f6a2-d2f7-48be-b329-b73aaa526e5d_SetDate">
    <vt:lpwstr>2024-01-01T12:00:00Z</vt:lpwstr>
  </property>
  <property fmtid="{D5CDD505-2E9C-101B-9397-08002B2CF9AE}"
            pid="4"
            name="MSIP_Label_2096f6a2-d2f7-48be-b329-b73aaa526e5d_Method">
    <vt:lpwstr>Privileged</vt:lpwstr>
  </property>
  <property fmtid="{D5CDD505-2E9C-101B-9397-08002B2CF9AE}"
            pid="5"
            name="MSIP_Label_2096f6a2-d2f7-48be-b329-b73aaa526e5d_Name">
    <vt:lpwstr>Confidential</vt:lpwstr>
  </property>
  <property fmtid="{D5CDD505-2E9C-101B-9397-08002B2CF9AE}"
            pid="6"
            name="MSIP_Label_2096f6a2-d2f7-48be-b329-b73aaa526e5d_SiteId">
    <vt:lpwstr>cb46c030-1825-4e81-a295-151c039dbf02</vt:lpwstr>
  </property>
  <property fmtid="{D5CDD505-2E9C-101B-9397-08002B2CF9AE}"
            pid="7"
            name="MSIP_Label_2096f6a2-d2f7-48be-b329-b73aaa526e5d_ActionId">
    <vt:lpwstr>88124cf5-1340-457d-90e1-0000a9427c99</vt:lpwstr>
  </property>
  <property fmtid="{D5CDD505-2E9C-101B-9397-08002B2CF9AE}"
            pid="8"
            name="MSIP_Label_2096f6a2-d2f7-48be-b329-b73aaa526e5d_ContentBits">
    <vt:lpwstr>2</vt:lpwstr>
  </property>
</Properties>
The MSIP (Microsoft Information Protection) labels in the name attributes
contain a GUID that is unique to each company. The “SiteId” field will also be
unique to your company/location. The meaning of each of these fields is
explained in the the following Microsoft document on Microsoft Information
Protection SDK - Metadata.
Once you have identified the necessary metadata you can add it to a new document as shown below:
import xlsxwriter

workbook = xlsxwriter.Workbook("sensitivity_label.xlsx")
worksheet = workbook.add_worksheet()

# Metadata extracted from a company specific file.
company_guid = "2096f6a2-d2f7-48be-b329-b73aaa526e5d"
site_id = "cb46c030-1825-4e81-a295-151c039dbf02"
action_id = "88124cf5-1340-457d-90e1-0000a9427c99"

# Add the document properties. Note that these should all be in text format.
workbook.set_custom_property(f"MSIP_Label_{company_guid}_Enabled", "true", "text")
workbook.set_custom_property(f"MSIP_Label_{company_guid}_SetDate", "2024-01-01T12:00:00Z", "text")
workbook.set_custom_property(f"MSIP_Label_{company_guid}_Method", "Privileged", "text")
workbook.set_custom_property(f"MSIP_Label_{company_guid}_Name", "Confidential", "text")
workbook.set_custom_property(f"MSIP_Label_{company_guid}_SiteId", site_id, "text")
workbook.set_custom_property(f"MSIP_Label_{company_guid}_ActionId", action_id, "text")
workbook.set_custom_property(f"MSIP_Label_{company_guid}_ContentBits", "2", "text")

workbook.close()
Note, some sensitivity labels require that the document is encrypted. In order to extract the required metadata you will need to unencrypt the file which may remove the sensitivity label. In that case you may need to use a third party tool such as msoffice-crypt.
workbook.define_name()#
- define_name()#
Create a defined name in the workbook to use as a variable.
- Parameters:
name (string) – The defined name.
formula (string) – The cell or range that the defined name refers to.
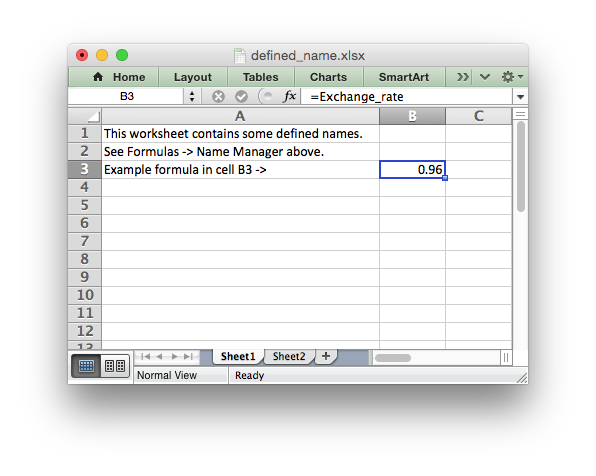
This method is used to defined a name that can be used to represent a value, a single cell or a range of cells in a workbook. These are sometimes referred to as a “Named Range”.
Defined names are generally used to simplify or clarify formulas by using descriptive variable names:
workbook.define_name('Exchange_rate', '=0.96')
worksheet.write('B3', '=B2*Exchange_rate')
As in Excel a name defined like this is “global” to the workbook and can be referred to from any worksheet:
# Global workbook name.
workbook.define_name('Sales', '=Sheet1!$G$1:$H$10')
It is also possible to define a local/worksheet name by prefixing it with the
sheet name using the syntax 'sheetname!definedname':
# Local worksheet name.
workbook.define_name('Sheet2!Sales', '=Sheet2!$G$1:$G$10')
If the sheet name contains spaces or special characters you must follow the Excel convention and enclose it in single quotes:
workbook.define_name("'New Data'!Sales", '=Sheet2!$G$1:$G$10')
The rules for names in Excel are explained in the Microsoft Office documentation on how to Define and use names in formulas.
See also Example: Defined names/Named ranges.
workbook.add_vba_project()#
- add_vba_project(vba_project[, is_stream])#
Add a vbaProject binary to the Excel workbook.
- Parameters:
vba_project – The vbaProject binary file name.
is_stream (bool) – The vba_project is an in memory byte stream.
The add_vba_project() method can be used to add macros or functions to a
workbook using a binary VBA project file that has been extracted from an
existing Excel xlsm file:
workbook.add_vba_project('./vbaProject.bin')
Only one vbaProject.bin file can be added per workbook. The name doesn’t
have to be vbaProject.bin. Any suitable path/name for an existing VBA bin
file will do.
The is_stream parameter is used to indicate that vba_project refers to
a BytesIO byte stream rather than a physical file. This can be used when
working with the workbook in_memory mode.
See Working with VBA Macros for more details.
workbook.add_signed_vba_project()#
- add_signed_vba_project(vba_project,
- signature [,
- project_is_stream, [
- signature_is_stream ]]):
Add a vbaProject binary and a vbaProjectSignature binary to the Excel workbook.
The add_signed_vba_project() method can be used to add digitally
signed macros or functions to a workbook. The method adds a binary VBA project
file and a binary VBA project signature file that have been extracted from an
existing Excel xlsm file with digitally signed macros:
workbook.add_signed_vba_project(‘./vbaProject.bin’, ‘./vbaProjectSignature.bin’)
Only one vbaProject.bin file can be added per workbook. The name doesn’t
have to be vbaProject.bin. Any suitable path/name for an existing VBA bin
file will do. The same applies for vbaProjectSignature.bin.
The project_is_stream (signature_is_stream, resp.) parameter is used to indicate
that vba_project (signature, resp.) refers to a BytesIO byte stream rather than
a physical file. This can be used when working with the workbook in_memory mode.
See Working with VBA Macros for more details.
workbook.set_vba_name()#
- set_vba_name(name)#
Set the VBA name for the workbook.
- Parameters:
name (string) – The VBA name for the workbook.
The set_vba_name() method can be used to set the VBA codename for the
workbook. This is sometimes required when a vbaProject macro included via
add_vba_project() refers to the workbook. The default Excel VBA name of
ThisWorkbook is used if a user defined name isn’t specified.
See Working with VBA Macros for more details.
workbook.worksheets()#
- worksheets()#
Return a list of the worksheet objects in the workbook.
- Return type:
A list of worksheet objects.
The worksheets() method returns a list of the worksheets in a workbook.
This is useful if you want to repeat an operation on each worksheet in a
workbook:
for worksheet in workbook.worksheets():
    worksheet.write('A1', 'Hello')
workbook.get_worksheet_by_name()#
- get_worksheet_by_name(name)#
Return a worksheet object in the workbook using the sheetname.
- Parameters:
name (string) – Name of worksheet that you wish to retrieve.
- Return type:
A worksheet object.
The get_worksheet_by_name() method returns the worksheet or chartsheet
object with the given name or None if it isn’t found:
worksheet = workbook.get_worksheet_by_name('Sheet1')
workbook.get_default_url_format()#
The get_default_url_format() method gets a copy of the default url format
used when a user defined format isn’t specified with write_url(). The
format is the hyperlink style defined by Excel for the default theme:
url_format = workbook.get_default_url_format()
workbook.set_calc_mode()#
- set_calc_mode(mode)#
Set the Excel calculation mode for the workbook.
- Parameters:
mode (string) – The calculation mode string
Set the calculation mode for formulas in the workbook. This is mainly of use for workbooks with slow formulas where you want to allow the user to calculate them manually.
The mode parameter can be:
auto: The default. Excel will re-calculate formulas when a formula or a value affecting the formula changes.manual: Only re-calculate formulas when the user requires it. Generally by pressing F9.auto_except_tables: Excel will automatically re-calculate formulas except for tables.
workbook.use_zip64()#
- use_zip64()#
Allow ZIP64 extensions when writing the xlsx file zip container.
Use ZIP64 extensions when writing the xlsx file zip container to allow files greater than 4 GB.
Note
When using the use_zip64() option the zip file created by the Python
standard library zipfile.py may cause Excel to issue a warning about
repairing the file. This warning is annoying but harmless. The “repaired”
file will contain all of the data written by XlsxWriter, only the zip
container will be changed.
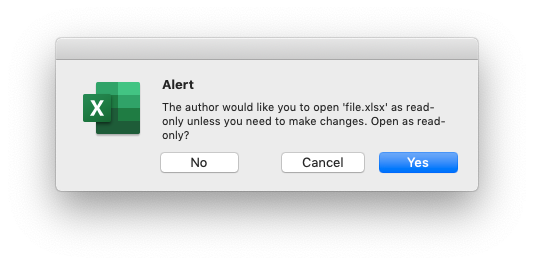
workbook.read_only_recommended()#
- read_only_recommended()#
Add a recommendation to open the file in “read-only” mode.
This method can be used to set the Excel “Read-only Recommended” option that is available when saving a file. This presents the user of the file with an option to open it in “read-only” mode. This means that any changes to the file can’t be saved back to the same file and must be saved to a new file. It can be set as follows:
import xlsxwriter

workbook = xlsxwriter.Workbook('file.xlsx')
worksheet = workbook.add_worksheet()

workbook.read_only_recommended()

workbook.close()
Which will raise a dialog like the following when opening the file: